
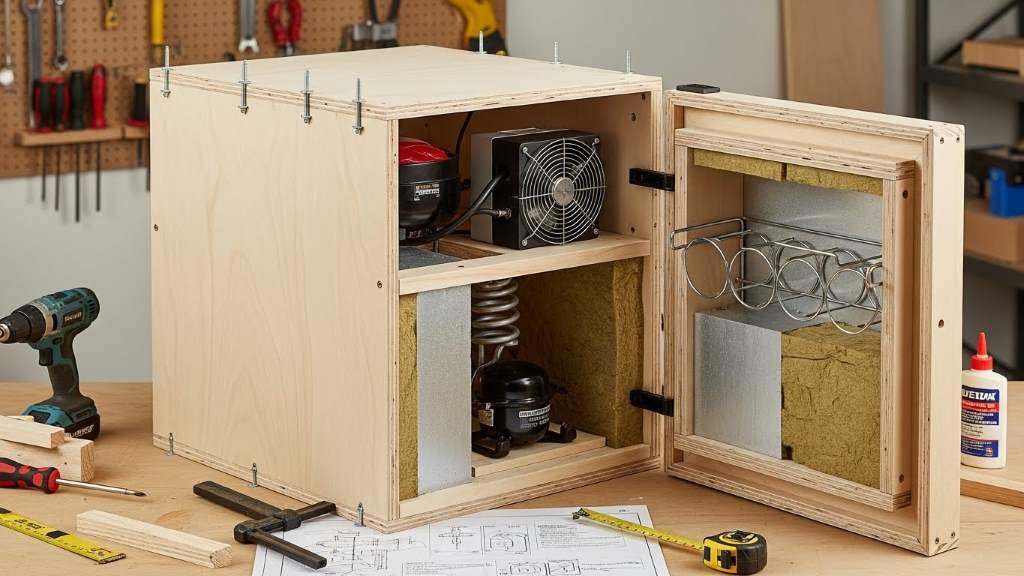
Imagine sipping a perfectly chilled glass of wine after a long day. You pull the bottle from your own custom countertop wine fridge. This setup fits right in your kitchen. You built it yourself. Sounds appealing? Many wine lovers want convenient storage without buying expensive units. Building your own offers customization and savings. This guide shows you how step by step. You gain a functional piece that keeps your wines at ideal temperatures.
People often buy ready made wine fridges. Yet, a DIY project lets you tailor size, style, and features. Countertop models save space. They sit on your counter or table. Use thermoelectric cooling for quiet operation. This method avoids vibrations that harm wine sediment. According to industry experts, proper storage extends wine life and improves taste.
Follow this tutorial to create a compact unit. It holds several bottles. You need basic tools and materials. No advanced skills required. Start with planning. Then gather supplies. Build the structure. Add cooling. Finish with testing. By the end, you have a reliable wine fridge.
Why Build Your Own Countertop Wine Fridge
Store bought wine fridges cost hundreds. A DIY version saves money. You spend less on parts. Plus, you learn new skills. Customize to match your kitchen decor. Choose wood finishes or colors.
Benefits include better control over temperature. Wine needs 45 to 65 degrees Fahrenheit. Thermoelectric systems maintain this range. They run silently. No compressor noise disturbs your home.
Based on manufacturer guidelines, humidity matters too. Aim for 50 to 70 percent. Your build includes features for this. Add a small water tray inside.
Building boosts satisfaction. You create something useful. Share the project with friends. They admire your work. Plus, it adds value to your space.
Consider space limits. Countertop units fit small areas. Ideal for apartments or tiny kitchens. They hold 6 to 12 bottles. Enough for casual collectors.
Safety comes first. Use proper insulation. Avoid electrical hazards. Follow wiring standards. Professionals recommend grounding all connections.
Planning Your DIY Wine Fridge Project
Start with measurements. Decide on size. A typical countertop unit measures 18 inches wide, 12 inches deep, 20 inches tall. Adjust based on your counter space.
Think about bottle count. Standard wine bottles are 3 inches wide, 12 inches tall. Plan shelves accordingly. Space them 4 inches apart.
Choose cooling type. Thermoelectric works best for small units. It uses Peltier modules. These create cold on one side, heat on the other.
Sketch your design. Draw the box, door, shelves. Note where the cooling unit goes. Usually on the back.
Budget for parts. Expect to spend 100 to 200 dollars. List costs for wood, Peltier module, fans, controller.
Time the project. It takes 10 to 15 hours over a weekend. Gather tools like saw, drill, screwdriver.
Check local codes. Some areas require permits for electrical work. Consult experts if unsure.
Materials and Tools Needed
Gather everything before starting. This avoids delays.
Materials:
- Plywood or MDF for the box: 1/2 inch thick sheets.
- Insulation foam: 1 inch thick panels.
- Peltier module: TEC1-12706 model, common for DIY coolers.
- Heatsinks: One large for hot side, one small for cold.
- Fans: 12V computer fans for cooling heatsinks.
- Temperature controller: W1209 module with sensor.
- Power supply: 12V adapter, 5A or more.
- Hinges and latch for door.
- Glass or acrylic for door window (optional).
- Screws, glue, sealant.
- Humidity tray: Small plastic container.
- Shelves: Wire racks or wood slats.
Tools:
- Circular saw or jigsaw.
- Drill with bits.
- Screwdriver set.
- Measuring tape.
- Sandpaper.
- Wire cutters and strippers.
- Multimeter for testing.
According to widely accepted industry standards, use food safe materials inside. Avoid toxic glues.
Step-by-Step Guide to Building the Structure
Build the enclosure first. This houses the cooling system.
- Cut the wood panels. Measure and cut sides, top, bottom, back. Front is the door.
- Assemble the box. Glue and screw sides to bottom. Add top. Leave back open for now.
- Install insulation. Line inside with foam panels. Cut to fit. Seal edges with tape.
- Add shelves. Drill holes for supports. Insert wire racks. Space for bottles.
- Make the door. Cut a panel. Add hinges to one side. Install latch opposite.
- Optional: Add window. Cut hole in door. Insert glass. Seal around edges.
Ensure tight fits. Gaps let cold escape. Use weather stripping on door.
Professionals recommend painting or staining wood. This protects against moisture.
Installing the Thermoelectric Cooling System
Now add the cooling heart.
Prepare the Peltier module. Attach small heatsink to cold side with thermal paste. Large heatsink to hot side.
Cut hole in back panel. Size it for the cold heatsink. Insert module so cold side inside.
Mount fans. One on hot heatsink to blow air out. Another optional inside for circulation.
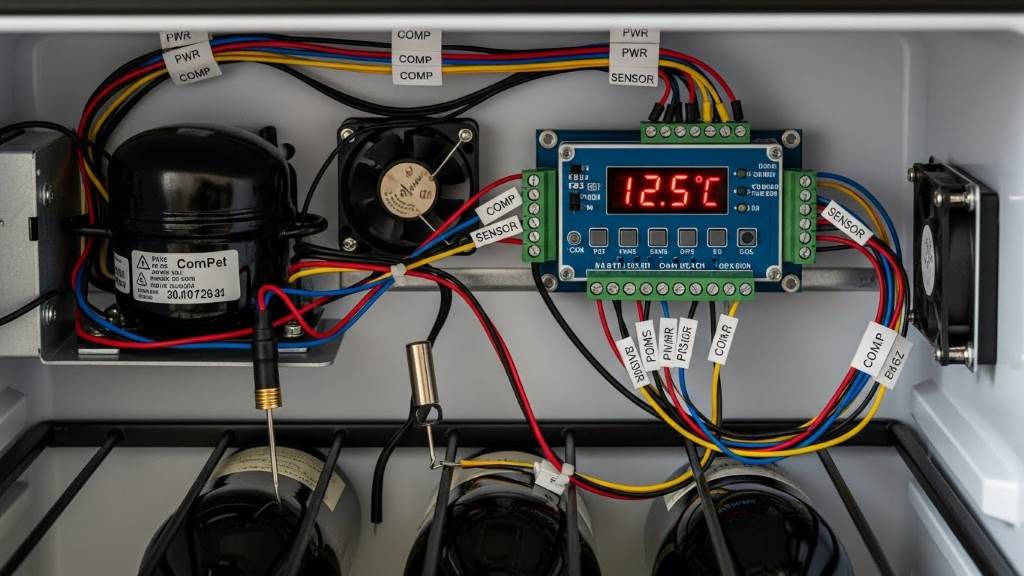
Wire the system. Connect Peltier and fans to power supply. Positive to red, negative to black.
Add temperature controller. Wire sensor inside box. Set to 55 degrees Fahrenheit.
Test connections. Use multimeter. Ensure no shorts.
Based on manufacturer guidelines, run fans constantly. This prevents overheating.
Wiring and Electrical Setup
Safety is key here.
Start with power supply. Plug into outlet. Use surge protector.
Connect controller. Follow module diagram. Input from power, output to Peltier.
Add switch. For easy on off.
Ground wires. Attach to metal chassis if used.
Test voltage. Should read 12V.
If adding lights, wire LED strips inside.
Industry experts suggest using fused wires. Protects against overloads.
Adding Finishing Touches
Make it look good.
Sand all surfaces. Smooth edges.
Apply finish. Use varnish for wood.
Add handles. For easy door opening.
Install feet. Rubber pads prevent scratches on counter.
Label controls. Mark temperature dial.
Add humidity control. Place water tray on bottom. Refill as needed.
Check seals. Close door. Feel for drafts.
Testing and Calibration
Power on the unit.
Monitor temperature. Use separate thermometer.
Adjust controller. Set lower if needed.
Check cooling time. Empty box should reach 55 degrees in 2 hours.
Load with bottles. Test again. Full load takes longer.
Listen for noise. Should be quiet.
Measure humidity. Add hygrometer.
If issues, recalibrate sensor.
As recommended by professionals, run for 24 hours empty first.
Maintenance Tips for Your DIY Wine Fridge
Keep it running well.
Clean monthly. Wipe inside with mild soap.
Check seals. Replace if worn.
Monitor temperature daily at first.
Refill humidity tray.
Dust fans. Use compressed air.
Inspect wires. Look for damage.
According to industry standards, avoid overloading. Stick to planned bottle count.
Troubleshooting Common Issues
Problems happen. Fix them quick.
Not cooling: Check power. Test Peltier with multimeter.
Too noisy: Balance fans. Tighten screws.
Temperature swings: Calibrate controller. Add more insulation.
Condensation: Increase ventilation on hot side.
Door won’t close: Adjust hinges.
Overheating: Clean heatsinks.
Experts advise consulting diagrams for wiring fixes.
Variations and Customizations
Make it unique.
Larger size: Use bigger box. Add more Peltier modules.
Dual zone: Separate sections. Different temperatures.
Smart features: Add WiFi controller. Monitor via app.
Wood types: Use oak for rustic look.
Lighting: Install RGB LEDs.
Bottle orientation: Horizontal racks preserve corks.
Based on popular builds, integrate into counter for seamless fit.
Cost Breakdown and Savings
Track expenses.
Wood: 30 dollars.
Peltier and heatsinks: 20 dollars.
Controller and power: 15 dollars.
Fans: 10 dollars.
Insulation: 10 dollars.
Misc: 15 dollars.
Total around 100 dollars.
Store bought: 200 to 500 dollars.
Save up to 400 dollars.
Plus, no shipping costs.
Environmental Considerations
Go green.
Use recycled wood.
Choose efficient Peltier. Low energy use.
Avoid harmful foams.
Recycle old parts.
Your build reduces waste. No packaging from bought units.
Safety Precautions During Build and Use
Prioritize safety.
Wear gloves. Handle sharp tools.
Use eye protection. When cutting.
Work in ventilated area. For glues.
Unplug before wiring.
Keep away from water.
Supervise children.
Professionals stress proper grounding.
Conclusion
You now know how to build a countertop wine fridge. This project brings satisfaction and utility. Enjoy chilled wines anytime. Customize to your needs. Save money too.
Ready to start? Gather materials today. Build your own. Share photos with friends. For more DIY ideas, explore similar projects.
Call to action: Start your build now and elevate your wine experience.
FAQs
What temperature should I set my DIY wine fridge to?
Set it to 55 degrees Fahrenheit. This suits most wines. Reds a bit warmer, whites cooler.
How many bottles can a countertop wine fridge hold?
Typically 6 to 12. Depends on size. Plan based on your collection.
Is thermoelectric cooling effective for wine storage?
Yes. It provides stable temperatures without vibrations. Ideal for long term storage.
Can I build this without electrical experience?
Basic knowledge helps. Follow diagrams. If unsure, ask a friend or professional.
How do I maintain humidity in the fridge?
Use a small water tray. Monitor with a hygrometer. Aim for 60 percent.
What if my fridge doesn’t cool properly?
Check connections. Clean heatsinks. Ensure good insulation.
How long does the build take?
About 10 to 15 hours. Spread over a weekend.
Can I use this for other beverages?
Yes. Beer or soda too. Adjust temperature accordingly.
What power does it use?
Around 50 to 100 watts. Efficient for daily use.
Is it safe to leave on all the time?
Yes. If wired correctly. Use a timer if worried about energy.
References: